参考
- https://gofrp.org/docs/setup/
- https://www.jianshu.com/p/9523d888cf77
- https://cloud.tencent.com/developer/article/1626890?from=14588
- https://www.nbmao.com/archives/4452
- https://www.bookstack.cn/read/frp/README_zh.md
以下Server端为阿里云服务器,Client为树莓派
下载
分别在Client和Server端下载合适的frp资源包
https://github.com/fatedier/frp/releases
资源
1 | LICENSE |
这里可以根据自己的主机选择对应的资源下载,可以通过如下命令查看
1 | uname -a |
| 主机 | 下载类型 |
|---|---|
| 阿里云Server | frp_0.37.1_linux_amd64 |
| 树莓派Client | frp_0.37.1_linux_arm |
配置
Server
阿里云服务器中的 frp_0.37.1_linux_amd64/frps.ini进行如下配置
1 | [common] |
- bind_port:frp服务器启动占用的端口
- dashboard_port:frp服务器web看板占用的端口
- dashboard_user:web看板用户名
- dashboard_pwd:web看板密码
- token:Client连接时需要使用的token
- vhost_http_port:设置监听http端口 5212 主要是给家庭私有云使用
- vhost_https_port:设置监听https端口
- subdomain_host:二级域名
Client
树莓派中的frp_0.37.1_linux_arm/frpc.ini 进行如下配置
1 | [common] |
- server_addr 阿里云服务器的ip地址
- server_port = frp服务端占用的端口
- token = frp服务端 frps.ini配置文件中设置的token
启动
Server
1 | ./frps -c frps.ini |
Client
1 | ./frpc -c frpc.ini |
SSH连接
配置
1 | [ssh] |
- type:tcp模式
- local_ip:本地ip
- local_port:本地端口
- remote_port:服务端端口
连接
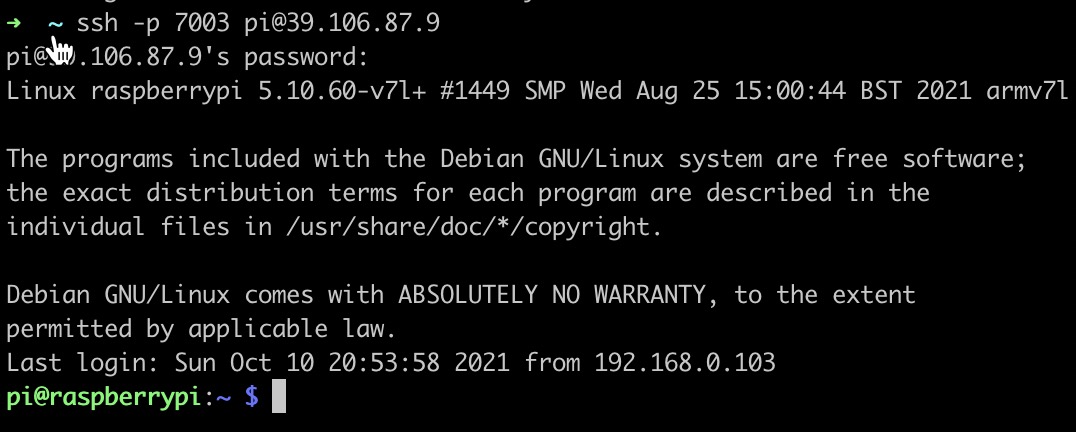
1 | ssh -p 7003 pi@39.106.87.9 |
- -p 7003 为服务器的端口
- pi为树莓派的用户名
- 39.106.87.9 为服务器ip地址
文件访问
配置
1 | [cloud resource] |
- plugin: 静态文件访问插件
- plugin_local_path:客户端访问的文件路径
- plugin_strip_prefix:域名前缀
- plugin_http_user:访问时用户名
- plugin_http_passwd:访问时用户密码
连接
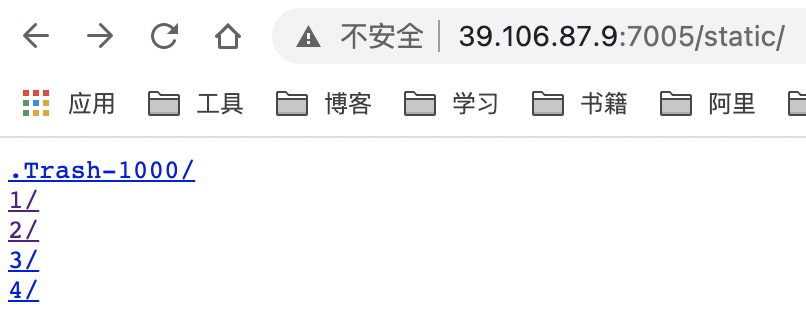
1 | http://39.106.87.9:7005/static/ |
Http网站
配置
1 | [blog http] |
- local_port:本地端口,这个端口使用nginx部署了一个blog web
- custom_domains:域名
8000 为私人博客web服务占用的端口,这里主要是将内网的blog web服务穿透到外网
连接
1 | www.juneleo.cn |
家庭私有云
1 | [cloud http] |
5212 为家庭私有云占用的端口,这里将家庭私有云进行了穿透
连接
1 | cloud.juneleo.cn |
博客和家庭私有云共用80端口,通过二级域名来区分